
Gsm-beyond is online destination to share and download FREE content,info or tutorial for you
Sunday 27 May 2012
Unlock Jailbroken iPhone On Any Baseband
Step 1) – The first thing you will need to do is open up Cydia on your iPhone and add a 3rd party repository from the developer who created SAM. With Cydia open go into the Manage tab, followed by the Sources section, and then tap the Edit button proceeded by the Add button and type in the following URL:
http://repo.bingner.com
Note: Be patient when adding the repo shown above. It is currently under a lot of stress, and it took me about 10 minutes before Cydia was able to process the repo properly.
Step 2) – Once the repo shown above has been added you will need to go into the sources page by simply tapping on it from the list of installed source and then find the SAM package.
When you see SAM you will need to install it to your iPhone.
WARNING: Make sure the SIM card you would like to use on your unlocked iPhone is inserted before moving on.
Step 3) – With SAM installed you will now need to open the utility by tapping the SAMPrefs icon on your SpringBoard (homescreen).
Step 4) – Go into the Utilities tab and then tap on the De-Activate iPhone option. In order to double check that your iPhone is truly de-activated return to the main settings menu and go into the More Information tab. Look at the ActivationState label and it should display as Unactivated.
Step 5) - Now go back to the main settings pane once again, and then into the Method tab where you will need to select the By Country and Carrier option. You will then need to select the Country you are going to be using your iPhone in and then your actual Carrier. Please keep in mind that for some carriers with more than one network ID you will need to select the SIM ID option instead of selecting your carrier’s name.
Step 6) – After you have selected your carrier that you wish to use your unlocked iPhone with go into the More Information tab once again and copy the IMSI number that is present in the SAM Details section
Step 7) – With the IMSI number copied down somewhere safe you will need to click the Spoof Real SIM to SAM button.
Step 8 ) – When you have pushed the Spoof Real SIM to SAM button you will need to once again go back to the main screen, find your way to the Method tab and select the Manual option. Upon selecting the Manual option and returning to the main screen you will notice an IMSI input field. Paste the IMSI number you copied in step 6 now.
Step 9) – Grab your iPhone’s USB cable and connect it to your computer so that you can use iTunes to re-activate your iPhone. When iTunes has finished re-activating your iPhone you will need to double click the Phone Number label found in the details pane and ensure the ICCID matches that found on the SIM Card. Unfortunately if the numbers do not match you will need to restart the process from the beginning.
Step 10) – As long as the ICCID numbers do match you will need to unplug your iPhone, go back into SAMPrefs and disable SAM by sliding the Enabled button to the off position. Finally re-connect your iPhone to iTunes and do not be worried if any error messages pop up alerting you that your iPhone cannot be activated. Simply ignore these messages and restart iTunes a few times.
Step 11) – After a few minutes you should notice signal bars on your iPhone. This means the process has been successful and you now have an unlocked iPhone with the SIM card of your choice. One last thing to keep in mind however, is that if you notice push notifications are not working you can simply select the Clear Push option found in SAM, followed by once again re-connecting your iPhone to iTunes.
For all of those that have successfully unlocked their iPhone following this How To guide please keep in mind that this process only works with the SIM card used during the unlocking process. If you would like to use multiple SIM cards on your unlocked iPhone then you will need to repeat the process on the other SIM cards. Additionally, it is also recommended that you manually save the activation ticket generated that allows you to use your iPhone unlocked as it could be crucial in the future to preserve your unlock.
Manually Save Activation Ticket
Step 1) – An unlock ticket will be generated after you successfully follow steps 1 – 10 outlined previously.
Step 2) – Use an SSH program to access your iPhone’s filesystem (WinSCP Windows or Cyberduck Mac OS X). You can of course also use something like iFile on your actual iPhone.
Step 3) – Navigate to the following directory:
/var/Root/ibrary/Lockdown
Once you are in the directory shown above you will need to copy the contents of the directory for each SIM card you unlock your iPhone with.
Saturday 26 May 2012
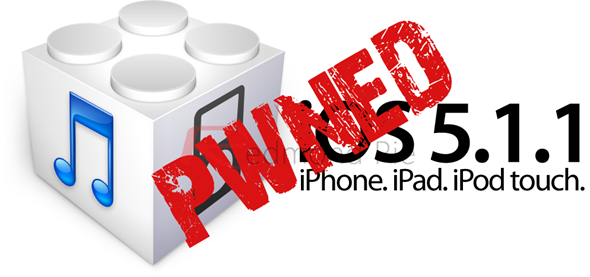
Jailbreak 5.1.1 untethered with absinthe 2.0

Full list of compatible devices for 5.1.1 untethered jailbreak are as follows:
- iPhone 4S
- iPhone 4
- iPhone 3GS
- iPad (3rd gen)
- iPad 2
- iPad 1
- iPod touch 3G
- iPod touch 4G
- Apple TV 2G
As a part of that hard work, the Chronic Dev Team have provided the necessary updates to their Absinthe tool, which was originally released back in January, and was the tool behind jailbreaking the iPhone 4S and the iPad 2 (on iOS 5.x) for the first time. Absinthe is an extremely simple GUI tool which allows users to inject the necessary files into their device so that they can benefit from the untethered jailbreak. If you happen to be sitting with an iOS 5.1.1 device in your hand, then read on for full details on how to use the Absinthe app to achieve an untether.
Important Note:
- Make a complete backup of your device using iTunes or iCloud before jailbreaking your device.
- If your iPhone relies on an unlock, do not update to stock iOS 5.1.1 firmware and for the time being stay away from Absinthe.
- If you have a passcode set on your device, make sure you disable it before following the instructions below.
How To Use Absinthe iOS 5.1.1 Untethered Jailbreak
Step 1: Download Absinthe 2.0 from here.
Download Absinthe 2.0 for Windows
Download Absinthe 2.0 for Mac
Step 2: Once the tool has been downloaded, find the compressed file and extract all of the contents like you would with any standard zip file. Place the files on your desktop for easy and quick access.
Download Absinthe 2.0 for Windows
Download Absinthe 2.0 for Mac
Step 2: Once the tool has been downloaded, find the compressed file and extract all of the contents like you would with any standard zip file. Place the files on your desktop for easy and quick access.
Step 3: Using a standard 30-pin connector cable, connect the device to be jailbroken with your computer.
Step 4: Launch the Absinthe tool through the executable file which you downloaded in step 1. When launched, the program will show an initial interface that will have some text-based information on it, and a “Jailbreak” button.

Step 5: If the device is connected properly as per step 3 then the Jailbreak button should be available. Press the button to begin the jailbreak process.
The initial Absinthe tool for iOS 5.0.1 accompanied with it a new method for jailbreaking iOS devices, so with that in mind, don’t be alarmed if the device looks like if it is going through a restore process. The progress bar on the Absinthe GUI will provide user feedback, please don’t touch the device at this time.
Step 6: When the payload process is complete and you’re confronted with your device’s lock screen, the ever familiar Cydia icon will be present on the home screen. The device is now successfully jailbroken untethered and you can now install any extensions or packages via Cydia, provided that your device is supported by them.
Tuesday 15 May 2012
Redsn0w 0.9.11b4 for tethered jailbreak ios 5.1.1
iPhone Dev team has released a new version of Redsn0w, which adds support for tethered jailbreak for iOS 5.1.1 for iPhone 4, iPhone 3GS, iPad 1, iPod touch 4G and iPod touch 3G users.
Redsn0w 0.9.11b4 also includes a bug fixes that was reported by users while trying to downgrade their iOS device.
Dev team has provided the following information on their blog about the latest version of Redsn0w:
Version 0.9.11b3 should fix the spurious “Restore failed” messages people were sometimes getting, and it behaves better with nearby devices that have wifi syncing enabled!
Version 0.9.11b4 completes the tethered JB support for 5.1.1 on A4 devices and earlier, including proper “Stitching” and “Custom” creation of NO_BB IPSWs.
Dev team had released Redsn0w 0.9.11b1 last week that allows users to downgrade their iPhone 4S and iPad 2 from iOS 5.1.1 or iOS 5.1 to iOS 5.0.1, if they've saved the SHSH blobs for iOS 5.0.1. Downgrading to iOS 5.0.1 allows A5 powered device users to perform the untethered jailbreak using Absinthe jailbreak.
Update: You can download the latest version of Redns0w using this link for Mac and this one for Windows.
If you need help with the downgrade process then you can try again with this new version of Redns0w. You can check our step-by-step guide to downgrade from iOS 5.1 or iOS 5.1.1 to iOS 5.0.1 for iPhone 4S (this link) and iPad 2 (this link), which have now been updated with Redsn0w 0.9.11b4 download links.
As always, let us know how it goes.
Subscribe to:
Posts (Atom)