
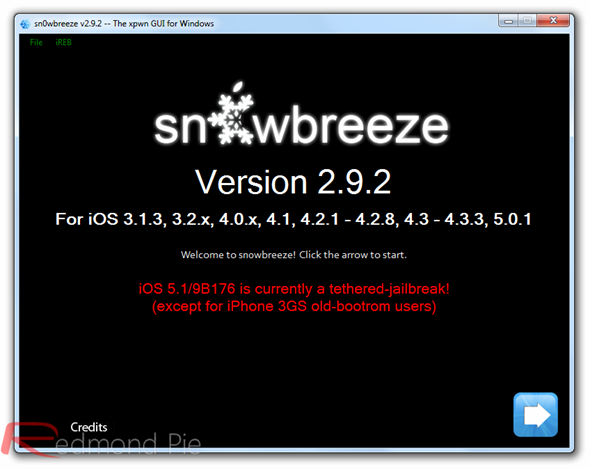
Like Redsn0w, the jailbreak provided by the newly released Sn0wbreeze 2.9.2 is currently of a tethered nature, meaning that if the device is powered down or requires a reboot for any reason, then it will need to be connected to a computer and rebooted into a jailbroken state to continue enjoying the Cydia based benefits. The update to Sn0wbreeze is also limited to those devices which are powered by Apple’s A4 processor, which as you might expect immediately rules out the iPad 2 and iPhone 4S as well as the latest iPad release when it eventually hits the shelves.
If you are the owner of an A4 or below (such as: iPhone 4, iPhone 3GS, iPad 1, iPod touch) powered device, and can live with the tethered status of the jailbreak, then read on below for a step by step guide on using Sn0wbreeze 2.9.2 to jailbreak iOS 5.1.
Creating custom firmware using Sn0wbreeze:
Step 1: Download a copy of the latest iOS 5.1 IPSW which is relevant to your device.
Step 2: Download and launch latest version of the Sn0wbreeze software, currently version 2.9.2.
Step 3: When presented with the main screen, click the blue arrow in the bottom right hand corner to continue.
Step 4: Sn0wbreeze will now provide the option to browse for the previously downloaded firmware file. Select ‘Browse‘ and point it to the location of the iOS 5.1 IPSW that we downloaded in step 1.
Step 5: If the firmware file is legitimate, Sn0wbreeze will process it briefly before displaying a page which shows a firmware verification message as well as the model of the attached device.
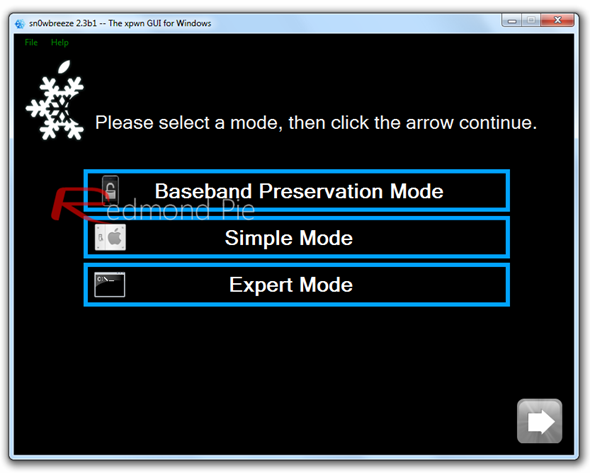
Step 6: Sn0wbreeze then presents the user with a number of selections. If you are planning on performing an unlock on iPhone 4 or 3GS (old basebands only), then select ‘Expert Mode‘ followed by the blue continue arrow.
Step 7: The next screen presents a number of options to cater for all usage types. If you are unsure about what each does, and all you care about is a simple jailbreak and Cydia installation, then select ‘Build IPSW‘ followed by clicking the continue arrow.
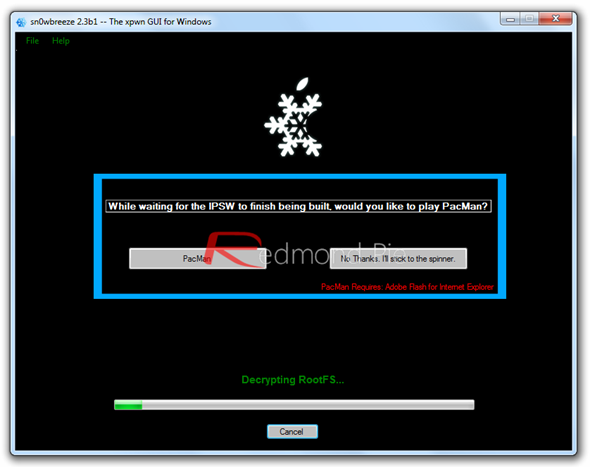
Step 8: Sn0wbreeze is a restore based tool and will now create a custom pwned iOS 5.1 firmware file. When completed, a confirmation screen will be presented with the successful completion of the process.
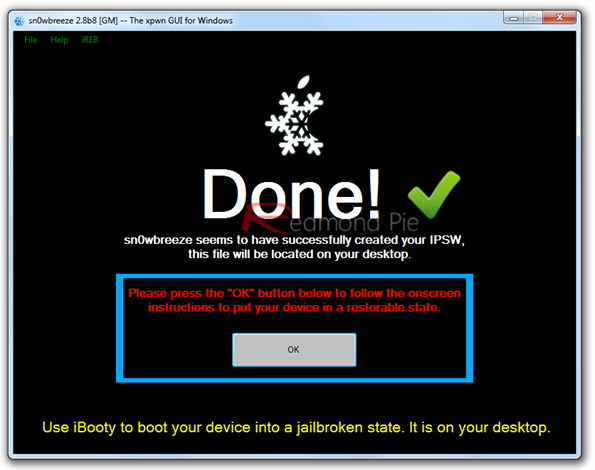
Step 9: The next step involves putting the device in DFU mode by following the on-screen instructions. When Sn0wbreeze detects DFU mode, the device’s screen will be black and a confirmation prompt will be shown.
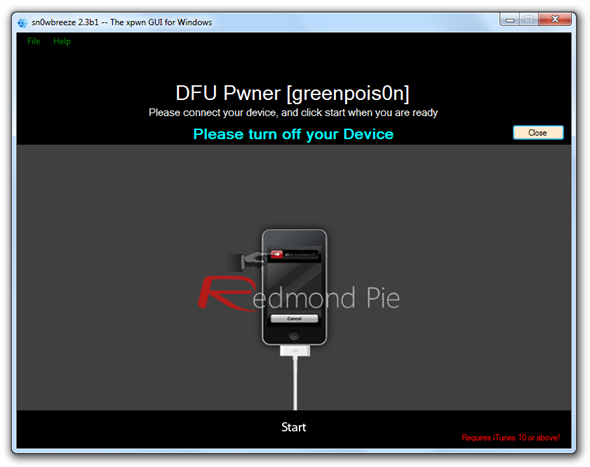
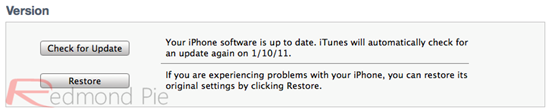
Step 10: The custom created firmware now needs to be loaded onto the iDevice. Open iTunes with the device still in DFU mode and click on the device name in the left hand side bar of iTunes. Hold down SHIFT and press the restore option in the window to bring up a directory search prompt. Find the custom created IPSW and double click to select. The process will be same for any official iTunes based restore and when completed, the device will be loaded with a pre-jailbroken firmware.
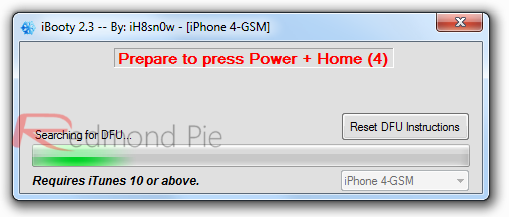
Booting the device into a tethered state using iBooty.
As we mentioned earlier in the post, the current available jailbreak for iOS 5.1 using the Sn0wbreeze method is of a tethered nature, requiring a tethered boot in the event of any power cycles. In the event of your device powering down or rebooting, you will need to follow these steps every time.
Step 1: Launch the iBooty utility and find the relevant device from the drop down list before selecting the ‘Start‘ option.
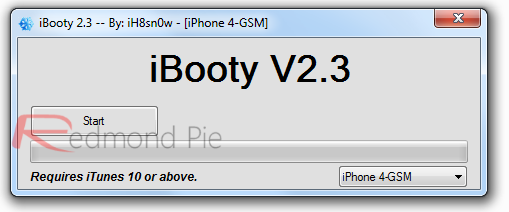
Step 2: After beginning the process, iBooty requires DFU mode once again, which can be achieved by following the on-screen prompts.
Step 3: iBooty will now do its thing and boot the device into a tethered jailbreak state. When completed, it will present the user with a completion message. Job done.